

Who doesn’t love a sweet treat that’s quick, easy, and absolutely irresistible? Chocolate rice krispies are the perfect no-bake dessert for any occasion—whether you’re whipping up a snack for the kids, prepping for a party, or simply craving something sweet and crunchy. Made with melted marshmallows, crispy cereal, and rich chocolate, this recipe brings a delightful mix of textures and flavors. The best part? You can customize it to your heart’s content, adding your favorite twists for a personal touch. Let’s dive into this fun and versatile recipe that’s sure to become a family favorite!
Table of Contents
Key Benefits of Chocolate Rice Krispies
Chocolate rice krispies are more than just a treat—they’re a lifesaver for busy days when you want something sweet but don’t have hours to spend in the kitchen. Here’s why they’re such a favorite:
- Quick and Easy: With just a few ingredients and minimal effort, you can have these ready in under 20 minutes. Perfect for last-minute cravings or surprise guests!
- Kid-Friendly: Little ones love the sweet, crunchy texture, making it a hit for lunchboxes, bake sales, or family movie nights.
- Versatile: You can easily customize this recipe to suit your taste—add sprinkles, drizzle with caramel, or swap milk chocolate for dark or white chocolate.
- No-Bake Convenience: No need to heat up your oven! This makes it an ideal dessert for hot summer days or when you’re short on time.
- Perfect for Sharing: Whether it’s a holiday gathering, birthday party, or potluck, these treats are always a crowd-pleaser.
Chocolate rice krispies bring together simplicity, flavor, and fun in one delightful bite. Once you try them, you’ll understand why they’ve been a classic favorite for generations!
Ingredients You’ll Need
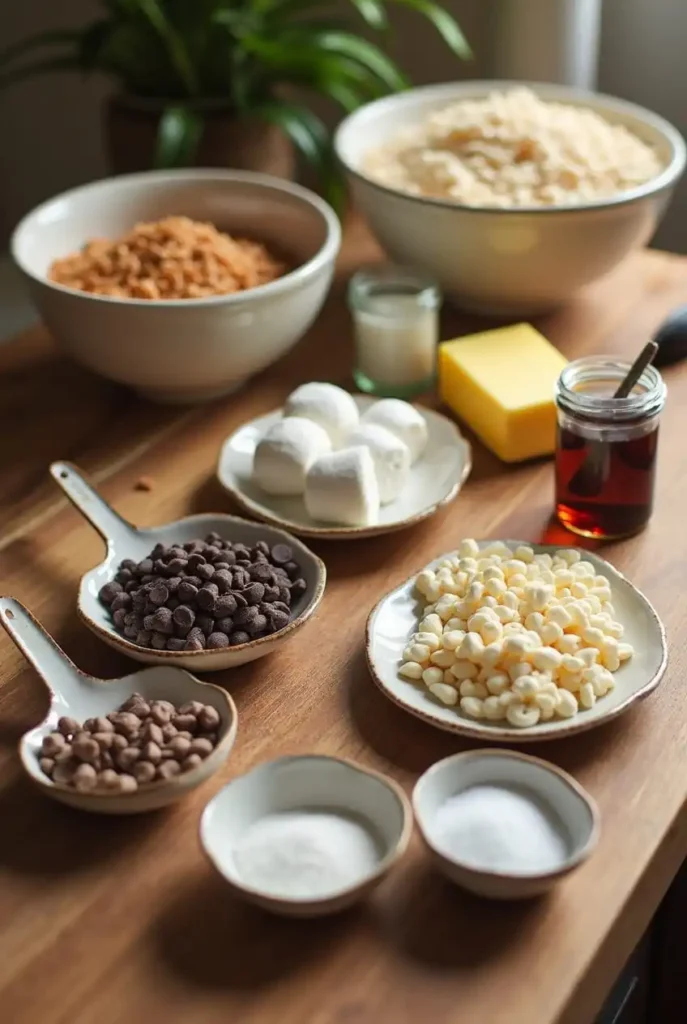
Making chocolate rice krispies is a breeze, especially when you have all the right ingredients on hand. Here’s everything you’ll need to whip up this sweet and crunchy treat:
- 6 cups of Rice Krispies cereal – The star of the show! This provides the signature crispy texture.
- 3 tablespoons of butter – For that rich, buttery flavor and smooth consistency.
- 1 package (10 oz) of marshmallows – The glue that holds it all together. Use mini marshmallows for quicker melting.
- 1 cup of chocolate chips – Milk chocolate, dark chocolate, or even white chocolate—it’s your call!
- (Optional): ½ teaspoon of vanilla extract – Adds a hint of extra flavor.
- (Optional): Sprinkles, nuts, or candy pieces – Perfect for customizing and adding a personal touch.
Pro Tip:
Keep your ingredients pre-measured and ready to go. Once you start melting the marshmallows, the process moves quickly, so having everything within reach makes it smoother.
With these simple pantry staples, you’re all set to create a dessert that’s as fun to make as it is to eat!
How to Make Chocolate Rice Krispies
Creating these delightful chocolate rice krispies is easy and fun! Here’s a step-by-step guide to help you make them effortlessly:
- Prepare Your Workspace
- Lightly grease a 9×13-inch baking dish or line it with parchment paper to make removing the rice krispies easier once they’ve set.
- Gather all your ingredients and tools to keep things organized and efficient.
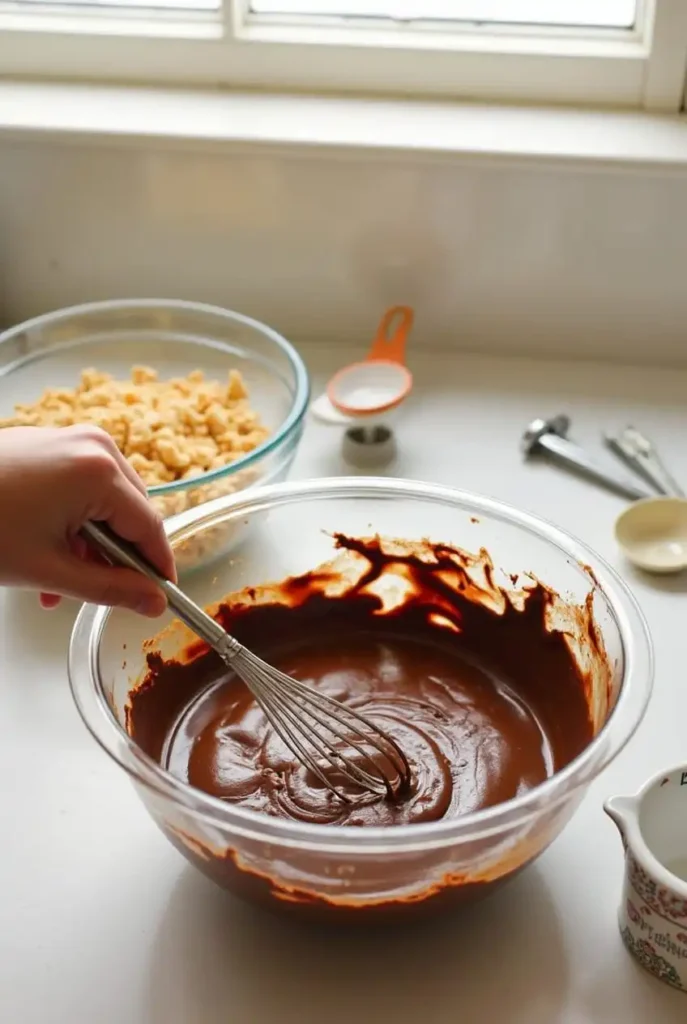
- Melt the Butter and Marshmallows
- In a large, non-stick saucepan, melt the butter over low heat.
- Add the marshmallows and stir constantly until they’re fully melted into a smooth, creamy mixture.
- (Tip: Keep the heat low to prevent scorching, and use a heat-resistant spatula for smooth stirring.)
- Incorporate the Chocolate
- Turn off the heat and immediately stir in the chocolate chips. Mix until the chocolate melts completely, creating a rich, glossy mixture.
- If desired, add a splash of vanilla extract for a subtle flavor enhancement.
- Combine with Rice Krispies
- Gradually fold in the Rice Krispies cereal. Stir gently but thoroughly to ensure every piece is evenly coated with the chocolate-marshmallow mixture.
- (Tip: Use a large mixing spoon or spatula to make this step easier.)
- Transfer and Press
- Pour the mixture into the prepared baking dish.
- Lightly grease your hands or a spatula and press the mixture firmly into an even layer. This ensures compact and uniform rice krispies.
- Cool and Set
- Let the mixture sit at room temperature for around 30 minutes to cool and firm up. For a quicker set, you can place it in the fridge for a faster result.
- Cut and Serve
- Once set, use a sharp knife to cut the rice krispies into squares, rectangles, or any shape you like.
- Serve immediately, or store them in an airtight container for up to a week.
Bonus Tip:
For an extra indulgent touch, drizzle melted chocolate or sprinkle crushed nuts over the top before the mixture cools. It adds a beautiful finish and extra flavor!
With these simple steps, you’ll have a batch of chocolate rice krispies that are perfectly crispy, gooey, and chocolatey—an instant crowd-pleaser!
Pro Tips and Variations
Ready to make your chocolate rice krispies even more amazing? Here are a few tips and fun variations to elevate your treat and add a personal twist:
- Add Peanut Butter
For a rich, nutty flavor, stir in a ½ cup of peanut butter with the butter and marshmallows. This creates a creamy, indulgent texture that pairs perfectly with the chocolate and cereal. - Try Different Chocolate
Switch things up by using dark chocolate, white chocolate, or even a combination. Each type brings a unique flavor, and you can experiment with different cocoa percentages to match your preference. - Sprinkle with Sea Salt
A touch of flaky sea salt on top can really enhance the sweetness and bring out the depth of the chocolate. It’s an unexpected twist that everyone will love! - Mix In Extras
Want to add some crunch or a burst of flavor? Consider mixing in ingredients like crushed nuts (almonds, walnuts, or pecans), dried fruit, or even crushed candy pieces. This not only adds texture but also gives each bite a fun surprise. - Make Them Festive
Perfect for holidays or special occasions! Add sprinkles, mini marshmallows, or colored candy pieces on top before they set. This makes them look extra festive for birthdays, holidays, or bake sales. - Go Gluten-Free
For a gluten-free version, simply check the labels on your Rice Krispies cereal to ensure they’re certified gluten-free. This way, everyone can enjoy the treat! - Make Bars or Bites
Want smaller portions? Press the mixture into a larger, shallow pan for bite-sized treats. Or, roll the mixture into small balls for quick snack-sized portions.
These simple tweaks allow you to customize your chocolate rice krispies and make them even more exciting! Whether you’re aiming for extra richness, a fun texture, or a seasonal twist, there’s always a way to make this recipe your own.
Serving Suggestions
Now that you’ve made your delicious chocolate rice krispies, it’s time to think about how to serve them! Here are some creative ideas to make your treats even more enjoyable:
- Classic Squares
The most traditional way to serve these is simply cut into squares or rectangles. This classic presentation is perfect for parties, bake sales, or as a quick afternoon snack with a cup of tea or coffee. - On a Dessert Platter
Arrange the rice krispies on a large platter, alongside other treats like cookies, brownies, or mini cupcakes. This creates a beautiful, shareable dessert spread that’s sure to impress guests. - Individually Wrapped for Gifts
Package them individually in clear cellophane bags tied with ribbon. These make fantastic homemade gifts for friends, family, or coworkers—especially for birthdays or holidays! - Ice Cream Topping
Crumble the rice krispies over vanilla or chocolate ice cream for an added crunch and a sweet, chocolatey flavor boost. It’s a fun way to elevate a simple dessert! - With Fresh Berries
Serve them alongside fresh berries, like raspberries, strawberries, or blueberries, for a contrast of flavors. The tangy sweetness of the fruit pairs wonderfully with the rich chocolate and crunchy texture of the rice krispies. - In A Lunchbox
These treats are great for packing in kids’ lunchboxes as a sweet, satisfying snack. You can even get creative by cutting them into fun shapes using cookie cutters. - For a Themed Party
If you’re hosting a themed party—whether it’s a birthday, holiday gathering, or just a casual get-together—decorate the rice krispies to match! Add sprinkles, edible glitter, or color them to suit the theme.
These serving ideas not only enhance the enjoyment of your chocolate rice krispies but also make them more versatile for any occasion. Whether you’re sharing them with friends or enjoying them yourself, there’s always a perfect way to serve these tasty treats!
Conclusion
And there you have it—a batch of delicious, chocolatey rice krispies that are as easy to make as they are irresistible! Whether you’re making them for a special occasion, a quick snack, or a fun baking project with kids, these treats never disappoint. The balance of crispy texture and gooey chocolate is simply perfect!
Remember, this recipe is incredibly versatile. You can customize it with different types of chocolate, add mix-ins like peanut butter or nuts, or dress it up with sprinkles for a festive touch. The possibilities are endless!
Once you’ve made your batch, don’t forget to share it with friends and family—they’ll love the crunchy, chocolatey goodness. And if you have leftovers (which is unlikely!), store them in an airtight container for up to a week, so you can enjoy them for days.
Chocolate rice krispies are the perfect combination of simple ingredients and big flavor. They’re guaranteed to become a go-to favorite in your recipe repertoire!

Chocolate Rice Krispies
Ingredients
- 6 cups of Rice Krispies cereal – The star of the show! This provides the signature crispy texture.
- 3 tablespoons of butter – For that rich buttery flavor and smooth consistency.
- 1 package 10 oz of marshmallows – The glue that holds it all together. Use mini marshmallows for quicker melting.
- 1 cup of chocolate chips – Milk chocolate dark chocolate, or even white chocolate—it’s your call!
- Optional: ½ teaspoon of vanilla extract – Adds a hint of extra flavor.
- Optional: Sprinkles, nuts, or candy pieces – Perfect for customizing and adding a personal touch.
Instructions
Prepare Your Workspace
- Lightly grease a 9×13-inch baking dish or line it with parchment paper to make removing the rice krispies easier once they’ve set.
- Gather all your ingredients and tools to keep things organized and efficient.
Melt the Butter and Marshmallows
- In a large, non-stick saucepan, melt the butter over low heat.
- Add the marshmallows and stir constantly until they’re fully melted into a smooth, creamy mixture.
- (Tip: Keep the heat low to prevent scorching, and use a heat-resistant spatula for smooth stirring.)
Incorporate the Chocolate
- Turn off the heat and immediately stir in the chocolate chips. Mix until the chocolate melts completely, creating a rich, glossy mixture.
- If desired, add a splash of vanilla extract for a subtle flavor enhancement.
Combine with Rice Krispies
- Gradually fold in the Rice Krispies cereal. Stir gently but thoroughly to ensure every piece is evenly coated with the chocolate-marshmallow mixture.
- (Tip: Use a large mixing spoon or spatula to make this step easier.)
Transfer and Press
- Pour the mixture into the prepared baking dish.
- Lightly grease your hands or a spatula and press the mixture firmly into an even layer. This ensures compact and uniform rice krispies.
Cool and Set
- Let the mixture sit at room temperature for around 30 minutes to cool and firm up. For a quicker set, you can place it in the fridge for a faster result.
Cut and Serve
- Once set, use a sharp knife to cut the rice krispies into squares, rectangles, or any shape you like.
- Serve immediately, or store them in an airtight container for up to a week.
Video
Notes
- Prep Time: 15 minutes
- Cook Time: 5 minutes
- Total Time: 20 minutes
- Servings: 12-16 squares
- Calories: 180 per serving (approximately)
FAQs About Chocolate Rice Krispies
1. Can I use other types of cereal for this recipe?
Absolutely! While Rice Krispies are traditional, you can get creative by using other cereals like Cornflakes, Cocoa Krispies, or even granola. Just make sure the cereal is crunchy to maintain the texture!
2. How can I make this recipe vegan?
To make chocolate rice krispies vegan, simply swap the regular butter for a plant-based alternative and use dairy-free chocolate chips. The marshmallows can also be replaced with vegan marshmallows available at most grocery stores.
3. Can I add toppings to my rice krispies?
Yes! You can add toppings such as sprinkles, mini marshmallows, or even drizzle with extra melted chocolate for an extra special touch. Get creative and make them your own!
4. How do I store chocolate rice krispies?
Store your rice krispies in an airtight container at room temperature. They will remain fresh for about a week when stored properly. For longer storage, you can freeze them for up to a month—just make sure to wrap them tightly!
5. Can I make these ahead of time?
Definitely! Chocolate rice krispies are a great make-ahead treat. You can prepare them the day before your event or gathering. They’ll keep their flavor and texture for days.
6. Can I add nuts or other mix-ins?
Yes! Nuts like almonds, pecans, or walnuts work great in this recipe. You can also mix in dried fruit, chocolate chunks, or even candy pieces for added flavor and texture.
7. Why are my rice krispies too sticky or hard?
If your rice krispies are too sticky, you may have used too much marshmallow or butter. If they’re too hard, you might have pressed them down too firmly into the pan. Try adjusting the amounts or gently pressing the mixture next time to get the perfect texture.
Feel free to experiment and enjoy this sweet treat—whether you’re making it for a party, holiday, or just a cozy snack at home, it’s sure to be a hit!