
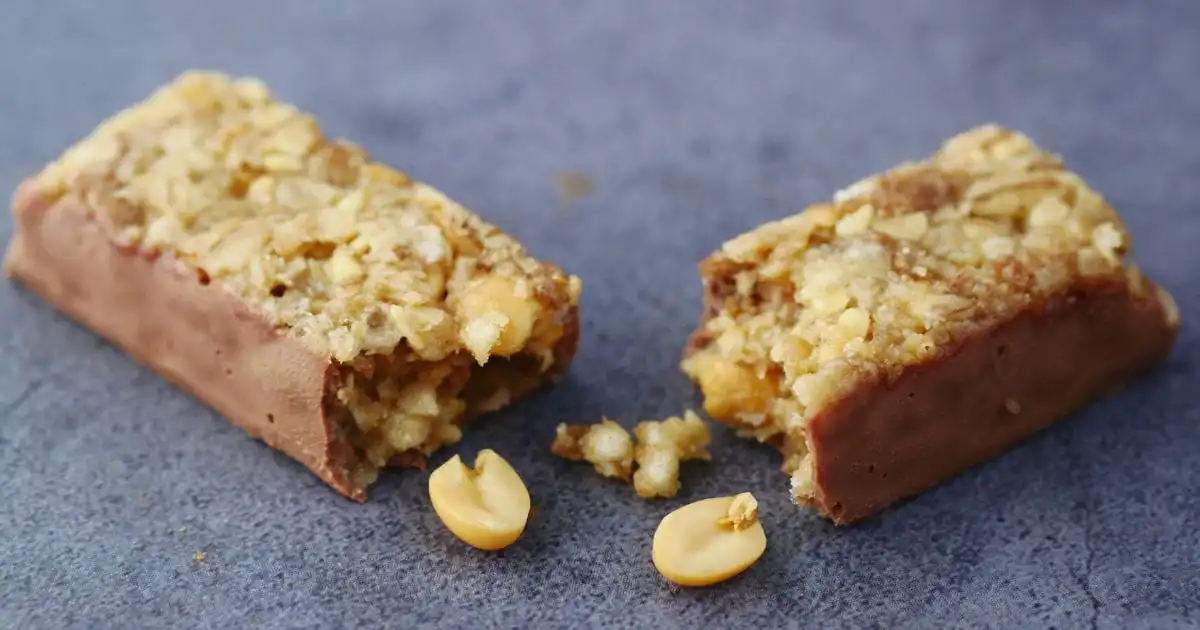
Are you craving a delicious, guilt-free snack that’s both satisfying and easy to make? Imagine sinking your teeth into a chewy, rich gluten free peanut butter bar —the perfect treat for health-conscious snack lovers like yourself. Whether you’re packing lunch for the kids or looking for a quick energy boost during a busy day, these bars have got you covered. Made with wholesome ingredients like natural peanut butter, gluten-free oats, and chia seeds, they’re not only tasty but also packed with nutrients. Best of all, this recipe is so simple that even if you’re new to baking, you’ll find it a breeze. Ready to dive in and create something truly delightful? Let’s get started on making your very own batch of delightfully irresistible gluten free peanut butter bars !
Table of Contents
Key Benefits for Gluten Free Peanut Butter Bars
Why should you give these gluten free peanut butter bars a try? Let’s dive into the amazing benefits that make them stand out:
- Nutrient-Rich Ingredients : Each bite is packed with wholesome goodness. Natural peanut butter provides healthy fats and protein, while gluten-free oats offer fiber to keep you full and satisfied.
- Energy Booster : These bars are perfect for an energy boost any time of day. Whether you’re heading to the gym or tackling a busy workday, they’ll fuel your body without weighing you down.
- Allergy-Friendly : Say goodbye to worries about gluten. These bars are crafted with care, ensuring they’re safe for those with gluten sensitivities or celiac disease.
- Customizable : Love variety? These bars can be easily customized to suit your taste buds. Swap out ingredients or add extras like nuts, seeds, or dried fruits for endless flavor combinations.
Here’s what makes these bars truly special:
- Deliciously Simple : You don’t need fancy kitchen gadgets or hours of prep time. With just a few basic tools and straightforward steps, you’ll have a batch ready in no time.
- Versatile Snack : Perfect for breakfast on-the-go, a midday snack, or even dessert, these bars fit seamlessly into any part of your day.
- Kid-Friendly : If you’ve got little ones at home, these bars are a hit! They’re nutritious, easy to eat, and fun to customize with their favorite toppings.
Imagine starting your morning with a bar that not only tastes great but also keeps you energized until lunch. Or picture yourself reaching for one during a hectic afternoon, knowing it’s a wholesome choice that won’t leave you feeling sluggish.
So, why settle for store-bought snacks when you can whip up something this delicious and nutritious right in your own kitchen? Let’s move on to gathering the ingredients and get started on making your very own batch of delightfully irresistible gluten free peanut butter bars . Trust me, once you take that first bite, you’ll be hooked!
Ingredients for Gluten Free Peanut Butter Bars
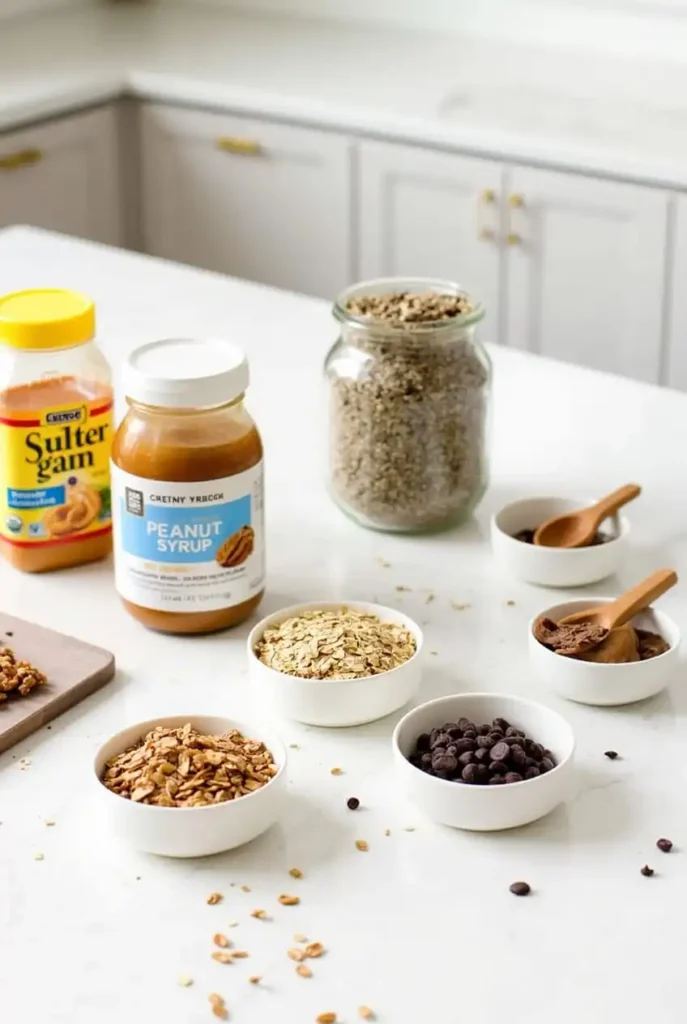
Let’s gather everything you’ll need to make these gluten free peanut butter bars . Having all your ingredients ready before you start will make the process smoother and more enjoyable. Here’s a simple list to get you going:
Core Ingredients for Gluten Free Peanut Butter Bars:
- Natural Peanut Butter : Opt for creamy or crunchy, depending on your preference. This forms the base of our bars, giving them that rich, nutty flavor.
- Gluten-Free Oats : These provide a hearty texture and are packed with fiber. Make sure they’re certified gluten-free to keep the recipe safe for everyone.
- Honey or Maple Syrup : Choose your favorite sweetener. Honey adds a classic touch, while maple syrup offers a subtle twist.
- Chia Seeds : Tiny but mighty, chia seeds add a nutritional boost with omega-3 fatty acids and antioxidants.
- Dark Chocolate Chips (optional) : For a touch of indulgence, fold in some dark chocolate chips. They melt beautifully and add a delightful richness.
Additional Tips for Gluten Free Peanut Butter Bars:
- Organic Options : If possible, opt for organic ingredients. They not only taste better but also offer peace of mind knowing they’re free from harmful chemicals.
- Non-GMO Choices : Look for non-GMO labels when shopping. This ensures your bars are as natural and wholesome as possible.
Here’s how you can organize your ingredients for easy access:
- Measure out 1 cup of natural peanut butter into a bowl.
- Set aside 1 ½ cups of gluten-free oats in another container.
- Pour ⅓ cup of honey or maple syrup into a small jug.
- Have 2 tablespoons of chia seeds at hand.
- Prepare ¼ cup of dark chocolate chips if you’re using them.
Now, let’s talk about why each ingredient is so important:
- Peanut Butter : It’s the star of the show, binding everything together and providing that irresistible peanut flavor.
- Oats : They give structure to the bars, making them substantial and filling.
- Sweeteners : Honey or maple syrup adds sweetness without overpowering the other flavors.
- Chia Seeds : These tiny seeds thicken the mixture slightly and pack a nutritional punch.
- Chocolate Chips : While optional, they add a luxurious touch and make the bars even more decadent.
Imagine mixing these ingredients together and creating something truly special. You’re not just making a snack; you’re crafting a treat that’s both delicious and nourishing.
Once you’ve gathered and measured your ingredients, it’s time to move on to the fun part—making the bars! Don’t worry, I’ll be here every step of the way to guide you through this easy and rewarding process. Let’s get cooking and create some delightfully irresistible gluten free peanut butter bars that you and your loved ones will adore!
How To Make Gluten Free Peanut Butter Bars
Discover easy-to-make, delicious gluten free peanut butter bars perfect for any snack time. Wholesome, customizable, and irresistibly tasty!
Now comes the exciting part—let’s transform those ingredients into some mouthwatering gluten free peanut butter bars that are as easy to make as they are delicious. Follow these simple steps, and you’ll have a batch ready in no time!
Step-by-Step Guide:
- Preheat Your Oven : Begin by preheating your oven to 350°F (175°C). This ensures it reaches the ideal temperature for baking, giving your bars that perfect golden hue.
- Mix Dry Ingredients : In a large mixing bowl, combine 1 ½ cups of gluten-free oats with 2 tablespoons of chia seeds. Stir them thoroughly so the seeds are evenly distributed throughout the oats. This will help every bite offer a delightful mix of textures.
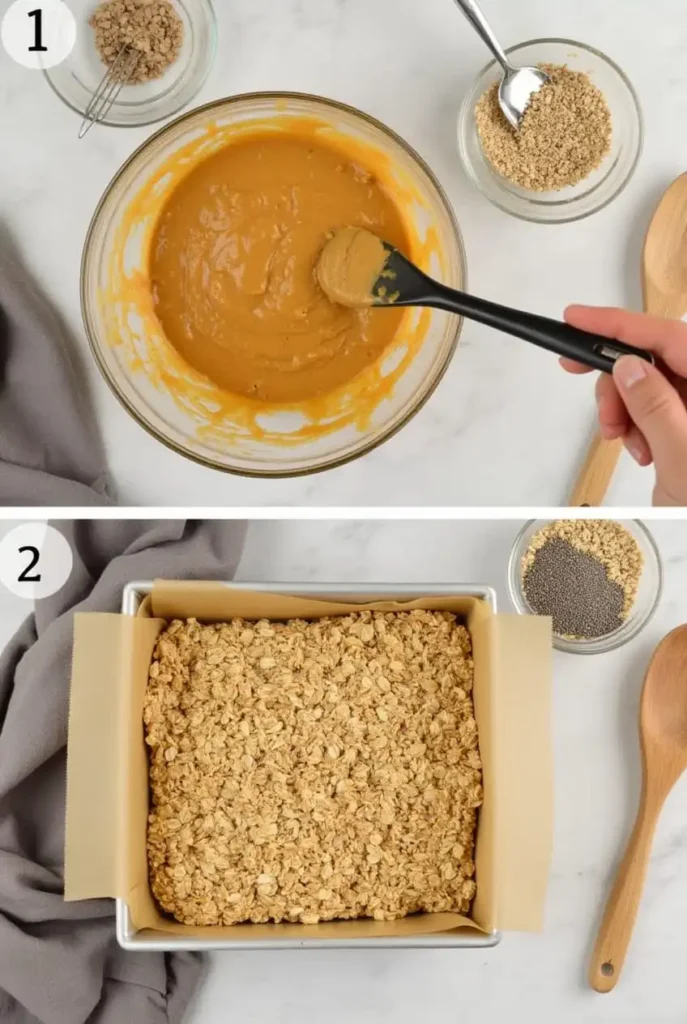
- Prepare Wet Ingredients : In another bowl, blend 1 cup of natural peanut butter with ⅓ cup of honey or maple syrup. Mix until smooth and well-integrated. If your peanut butter seems too thick, slightly warming it can make stirring easier.
- Combine Everything : Gradually add the dry ingredients to the wet mixture, stirring continuously. The dough should start to form a cohesive mass. If you’re using dark chocolate chips, now is the moment to fold them in for that extra indulgence.
- Press Into Pan : Line an 8×8-inch baking pan with parchment paper for hassle-free removal later. Transfer the dough into the pan and press it down firmly with a spatula or the back of a spoon. Ensure it’s spread out evenly and pressed well to avoid crumbly bars.
- Bake : Place the pan in the preheated oven and bake for about 20 minutes. Keep an eye on the bars near the end of the baking time to ensure they don’t become overly crisp.
Practical Tips:
- Essential Tools : You only need a sturdy mixing bowl, a silicone spatula, and an 8×8-inch baking pan. No need for complicated kitchen gadgets!
- Texture Adjustment : For chewier bars, reduce the baking time by 2-3 minutes. If you prefer a firmer texture, extend the baking time slightly but monitor closely to maintain the desired consistency.
- Storage : Store your bars in an airtight container at room temperature for up to a week. For longer storage, wrap them individually in plastic wrap and place them in a freezer bag.
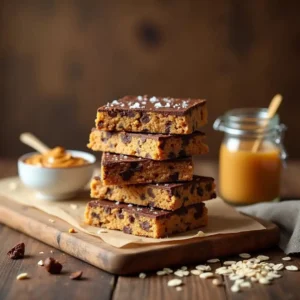
Imagine pulling these beautifully baked bars out of the oven, their aroma filling your kitchen. Each square is a harmonious blend of wholesome goodness and indulgent flavor, making them perfect for any occasion.
Here’s why this recipe is a winner:
- Simplicity : With just a few basic steps, you can whip up a batch even on your busiest days.
- Customization : Feel free to experiment with different add-ins like dried fruits, nuts, or even a sprinkle of sea salt on top for added excitement.
- Family-Friendly : These bars are not only tasty but also a clever way to sneak in nutritious ingredients your kids will enjoy.
So there you have it—a straightforward, foolproof method to create your very own gluten free peanut butter bars . Whether you’re enjoying one with your morning coffee or packing them for a midday snack, you’ll love how versatile and satisfying they are.
Ready to elevate your bars further? Let’s dive into some pro tips and variations to keep things interesting!
Pro Tips and Variations
Take your gluten free peanut butter bars from good to extraordinary with these tips:
Expert Tips:
- Consistency : If dough is sticky, add gluten-free flour. This keeps the right texture.
- Sweetness : Adjust sweetener to taste. Start with recommended amount, then tweak.
- Cooling : Let bars cool fully. For faster setting, place pan in fridge.
Creative Variations:
- Nutty Twist : Add almonds, walnuts, or pecans for crunch. Nuts boost flavor and nutrition.
- Fruit Fusion : Mix in dried cranberries, raisins, or dates for natural sweetness.
- Spice It Up : Try cinnamon, nutmeg, or sea salt. A hint of spice elevates the taste.
- Chocolate Delight : Use white chocolate chunks or melted chocolate for extra indulgence.
These tips enhance your gluten free peanut butter bars , making them perfect for any preference. Enjoy creating your signature bars that everyone will love!
Serving Suggestions
Your gluten free peanut butter bars are ready—let’s explore how to enjoy them!
Perfect Pairings:
- With Beverages : Enjoy with coffee, tea, almond milk, or a smoothie. The creamy textures and rich flavors make for an irresistible snack.
- As a Dessert : Serve with vanilla ice cream or Greek yogurt. Drizzle with honey or cinnamon for added indulgence.
- For Breakfast : Slice into smaller pieces. Serve with fresh fruit, nuts, or granola for a balanced start.
Presentation Tips:
- Plating Ideas : Arrange on a platter or stack in a jar. This adds easy access and rustic charm.
- Garnishes : Add powdered sugar, chocolate shavings, or sea salt for a gourmet touch.
Storage and Portability:
- Storing Properly : Keep in an airtight container at room temperature. They stay fresh for up to seven days. Freeze individually wrapped for longer storage.
- On-the-Go Snacks : Pack in lunchboxes or gym bags. These bars are perfect for quick, healthy snacks anytime.
Fun Variations:
- Seasonal Treats : Add crushed peppermint, dried cranberries, or pistachios. These add festive flavors.
- Party Favors : Wrap in cellophane or gift boxes. These make delightful take-home treats.
These gluten free peanut butter bars are versatile. They’re easy to present beautifully and perfect for busy lifestyles.
Experiment with different ways to enjoy these delicious treats. Share with loved ones. Pack for picnics. Savor them alone—there’s no wrong way to indulge!
Ready for the conclusion? Let’s address some FAQs next!
Conclusion
Congratulations! You’ve mastered making gluten free peanut butter bars —delicious, easy, and versatile. These treats are perfect for any time of day.
Why They Stand Out:
- Health-Conscious : Made with natural peanut butter, gluten-free oats, and chia seeds.
- Quick & Easy : Simple steps, minimal tools, ready in minutes.
- Versatile : Great for breakfast, snacks, or desserts.
What Readers Say:
- Satisfaction Guaranteed : Loved by all ages.
- Kid-Friendly : Healthy yet indulgent.
Next Steps:
- Experiment : Add nuts, dried fruits, or spices.
- Share : Perfect for gatherings and gifts.
- Explore : Try other gluten-free recipes.
These gluten free peanut butter bars bring joy and satisfaction. Enjoy baking and creating memorable moments. Happy baking!
Gluten Free Peanut Butter Bars Recipe
Ingredients
Core Ingredients:
- Natural Peanut Butter : Opt for creamy or crunchy depending on your preference. This forms the base of our bars, giving them that rich, nutty flavor.
- Gluten-Free Oats : These provide a hearty texture and are packed with fiber. Make sure they’re certified gluten-free to keep the recipe safe for everyone.
- Honey or Maple Syrup : Choose your favorite sweetener. Honey adds a classic touch while maple syrup offers a subtle twist.
- Chia Seeds : Tiny but mighty chia seeds add a nutritional boost with omega-3 fatty acids and antioxidants.
- Dark Chocolate Chips optional : For a touch of indulgence, fold in some dark chocolate chips. They melt beautifully and add a delightful richness.
Instructions
Step-by-Step Guide:
- Preheat Your Oven : Begin by preheating your oven to 350°F (175°C). This ensures it reaches the ideal temperature for baking, giving your bars that perfect golden hue.
- Mix Dry Ingredients : In a large mixing bowl, combine 1 ½ cups of gluten-free oats with 2 tablespoons of chia seeds. Stir them thoroughly so the seeds are evenly distributed throughout the oats. This will help every bite offer a delightful mix of textures.
- Prepare Wet Ingredients : In another bowl, blend 1 cup of natural peanut butter with ⅓ cup of honey or maple syrup. Mix until smooth and well-integrated. If your peanut butter seems too thick, slightly warming it can make stirring easier.
- Combine Everything : Gradually add the dry ingredients to the wet mixture, stirring continuously. The dough should start to form a cohesive mass. If you’re using dark chocolate chips, now is the moment to fold them in for that extra indulgence.
- Press Into Pan : Line an 8×8-inch baking pan with parchment paper for hassle-free removal later. Transfer the dough into the pan and press it down firmly with a spatula or the back of a spoon. Ensure it’s spread out evenly and pressed well to avoid crumbly bars.
- Bake : Place the pan in the preheated oven and bake for about 20 minutes. Keep an eye on the bars near the end of the baking time to ensure they don’t become overly crisp.
Video
Notes
- Natural peanut butter (creamy or crunchy)
- Gluten-free oats
- Honey or maple syrup
- Chia seeds
- Dark chocolate chips (optional)
- Preheat your oven to 350°F (175°C).
- Mix dry ingredients (oats and chia seeds) in one bowl.
- Blend wet ingredients (peanut butter and sweetener) in another bowl.
- Combine everything and fold in any optional mix-ins like dark chocolate chips.
- Press the mixture into an 8×8-inch baking pan lined with parchment paper.
- Bake for about 20 minutes until golden brown.
- Cool completely before slicing into squares.
FAQs
Got questions about making your gluten free peanut butter bars ? We’ve got answers! Here are some of the most common queries readers have, along with detailed responses to help you achieve perfect results every time.
1.Can I substitute honey with another sweetener?
Absolutely! Maple syrup or agave nectar work beautifully as alternatives. Just make sure to use a liquid sweetener to maintain the right consistency in the dough.
2.How long do these bars stay fresh?
Stored properly in an airtight container at room temperature, your bars should remain fresh for around seven days. For longer storage, freeze them individually wrapped and they’ll keep for up to three months.
2.Are these bars suitable for kids?
Definitely! These bars are packed with wholesome ingredients like oats and chia seeds, making them a nutritious and kid-friendly snack option. Plus, their naturally sweet taste will appeal to children of all ages.
4.What if my dough is too sticky?
If your dough feels overly sticky, try adding a tablespoon of gluten-free flour or more oats until it reaches a manageable consistency. This helps prevent the bars from becoming too crumbly when cut.
5.Can I add other mix-ins besides chocolate chips?
Absolutely! Get creative by adding nuts like almonds or walnuts, dried fruits such as cranberries or raisins, or even a sprinkle of cinnamon for added flavor. Experimenting with different mix-ins can lead to exciting new variations.
6.Do I need any special equipment?
No fancy gadgets required! A sturdy mixing bowl, a spatula, and an 8×8-inch baking pan are all you need. Simple tools mean less cleanup and more time enjoying your delicious creations.
7.Can I make these bars vegan?
Yes, simply use maple syrup instead of honey and choose dairy-free dark chocolate chips. With these changes, your bars will be completely plant-based.
8.How can I make the bars chewier?
For chewier bars, reduce the baking time by 2-3 minutes. Keep an eye on them towards the end of the baking time to ensure they don’t become too soft.
9.Can I substitute almond butter for peanut butter?
Yes, almond butter works just as well and adds a slightly different nutty flavor. Feel free to experiment with other nut butters like cashew or sunflower seed butter for variety.
10.How can I make the bars look more appealing?
Add a touch of elegance by garnishing each bar with a light dusting of powdered sugar, a few chocolate shavings, or a sprinkle of sea salt. You can also arrange them neatly on a platter or stack them in a glass jar for a rustic charm.