

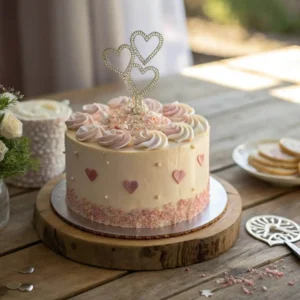
If you’re a Swiftie looking to celebrate in style, a Taylor Swift birthday cake is the perfect way to mark the occasion. Inspired by her Eras Tour, iconic albums, and signature aesthetics, this cake brings together music, creativity, and delicious flavors. Whether you want a Lover-era pastel cake, a bold Reputation-era black buttercream design, or a fun friendship bracelet-themed cake, there are endless ways to make it special.
This recipe is designed for both beginner and experienced bakers, offering step-by-step guidance on creating a stunning Taylor Swift cake. You’ll learn how to bake a soft, moist cake, frost it with smooth buttercream, and decorate it with sprinkles, piping, and Swiftie-themed toppers.
Prepare your kitchen to create and decorate because Taylor Swift magic should be part of every birthday celebration.
Table of Contents
Key Benefits of Taylor Swift Birthday Cake
Let’s be real—if you’re a Swiftie, you don’t just want a cake. You want a cake that screams Taylor Swift, whether it’s soft pastels from the Lover era, a moody black-and-gold Reputation theme, or a cake that looks like a giant friendship bracelet. The best part? This cake is as fun to make as it is to eat.
It’s All About the Eras
One of the coolest things about making a Taylor Swift birthday cake is how personal you can make it. Maybe you want a dreamy Folklore-inspired cake with rustic buttercream swirls, or maybe you’re all about the sparkles and pink for a 1989 vibe. Whatever your favorite album is, you can bring it to life in cake form.
Easy Enough for Beginners, Fun for Everyone
You don’t need to be a pro baker to pull this off. This recipe is simple, and I’ll walk you through it step by step. Even if you’ve never piped buttercream before, don’t worry—you can keep it simple with sprinkles and a cute topper, or go all out with intricate designs. Either way, it’ll look amazing and totally fit the Eras Tour theme.
Tastes as Good as It Looks
A cake should never just be about the looks (though let’s be honest, we love a cake that’s TikTok-worthy). This one is super moist, fluffy, and packed with flavor. You can go classic vanilla, rich chocolate, or even red velvet if you’re feeling extra. And the buttercream? Smooth, creamy, and just the right amount of sweet.
Perfect for Any Swiftie Celebration
Birthdays, album release parties, or just a random Tuesday because you’re in your Taylor Swift era—this cake fits any occasion. It’s also a great excuse to gather your fellow Swifties, blast your favorite Taylor playlist, and have some fun decorating together.
Bottom line? If you love Taylor, love cake, and love an excuse to get creative in the kitchen, this is the perfect recipe for you. So, grab your ingredients, turn on your favorite album, and let’s bake some Swiftie magic!
Ingredients for Taylor Swift Birthday Cake

Before we get into the fun part—baking and decorating—let’s talk ingredients. This Taylor Swift birthday cake is all about balance: a light, fluffy cake with a creamy, smooth buttercream frosting that’s easy to work with. Plus, you can totally customize the colors and decorations to match your favorite Taylor Swift era!
For the Cake:
You can use vanilla, chocolate, or funfetti as your base—whatever fits your vibe!
- 2 ½ cups (315g) all-purpose flour – The base for a soft, tender cake.
- 2 ½ tsp baking powder – Helps the cake rise and stay light.
- ½ tsp salt – Balances sweetness and enhances flavor.
- 1 cup (225g) unsalted butter, softened – Gives richness and moisture.
- 2 cups (400g) granulated sugar – Adds the perfect sweetness.
- 4 large eggs – Make the cake fluffy and hold everything together.
- 1 tbsp vanilla extract – Because everything is better with vanilla.
- 1 cup (240ml) whole milk – Adds moisture and keeps the cake soft.
(For a chocolate version, swap ½ cup of flour for ½ cup (40g) unsweetened cocoa powder.)
For the Buttercream Frosting:
This buttercream is smooth, pipeable, and perfect for decorating—whether you’re going for a pastel Lover theme or a bold Reputation look.
- 1 ½ cups (340g) unsalted butter, softened – The key to creamy, dreamy frosting.
- 5 cups (600g) powdered sugar – Sweet and smooth for easy piping.
- ¼ cup (60ml) heavy cream or milk – Adjusts the consistency.
- 1 tbsp vanilla extract – Adds that classic bakery flavor.
- A pinch of salt – Balances the sweetness.
- Gel food coloring – For Swiftie-inspired hues (pastel pink, bold red, deep blue—whatever matches your vibe!).
Fun Extras for Decorating:
This is where you can really bring your Taylor Swift cake ideas to life!
- Sprinkles – Because no Swiftie cake is complete without a little sparkle.
- Edible glitter – Perfect for a Fearless-era gold shimmer or Midnights-inspired shine.
- Piping bags & tips – For swirls, lettering, and fun accents.
- Heart-shaped cake topper – A nod to Lover or Red.
- Mini friendship bracelets (made from candy or icing) – For a fun Eras Tour touch.
- Edible markers – Write lyrics or song titles directly on the cake!
Now that we’ve got everything ready, it’s time to bake and decorate your Taylor Swift birthday cake!
How to Make a Taylor Swift Birthday Cake
Baking your Taylor Swift birthday cake is where the magic happens! From mixing the cake batter to decorating it with your favorite Swiftie-inspired touches, this process is fun and creative. Follow these steps to make sure your cake turns out perfect every time.
Step 1: Preheat & Prepare
Start by getting your oven ready for baking:
- Preheat your oven to 350°F (175°C).
- Grease and line two 8-inch round cake pans with parchment paper to ensure the cakes come out easily.
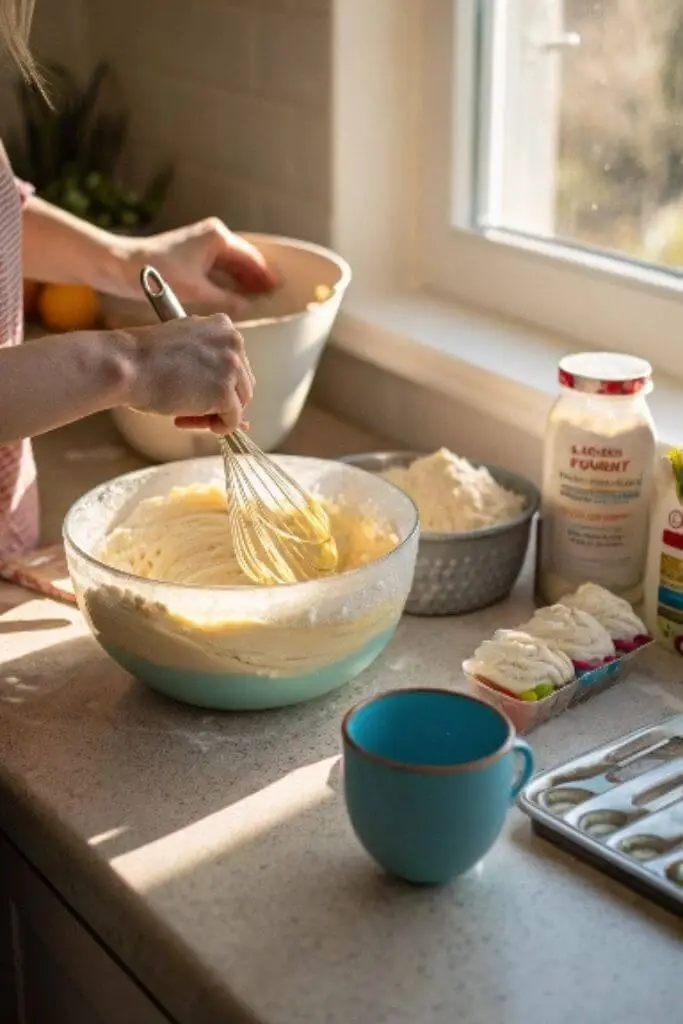
Step 2: Mix the Cake Batter
- Whisk the dry ingredients – In a medium bowl, whisk together the flour, baking powder, and salt. Set this aside for now.
- Cream the butter and sugar – In a large bowl, beat the softened butter and sugar using an electric mixer until the mixture is light and fluffy (this usually takes about 2-3 minutes).
- Add the eggs – Add the eggs one at a time, mixing well after each addition to keep the batter smooth. Once all the eggs are in, add the vanilla extract and beat until combined.
- Combine the dry and wet ingredients – Gradually add half of the dry ingredients into the batter, followed by half of the milk. Mix well before adding the remaining dry ingredients and milk. Stir gently until everything is just combined, making sure not to overwork the batter.
Step 3: Bake the Cake
- Pour the batter evenly into the two prepared cake pans.
- Bake in the preheated oven for 28-32 minutes, or until a toothpick inserted into the center comes out clean.
- Allow the cakes to cool in the pans for around 10 minutes, then carefully remove them and transfer to a wire rack to cool fully.
Step 4: Prepare the Buttercream Frosting
- Beat the softened butter in a large bowl until it’s smooth and creamy.
- Gradually add the powdered sugar, mixing at low speed to avoid a sugary cloud, then increase to medium speed until fully combined.
- Add vanilla extract and heavy cream, then beat on high for about 2-3 minutes until the frosting is light and fluffy. If you need to adjust the consistency, add a little more cream or powdered sugar as needed.
- Divide the frosting into separate bowls if you want to use different colors, then add gel food coloring to each bowl to match your chosen Taylor Swift era.
Step 5: Assemble the Cake
- Level your cakes – If the cakes have domed on top, carefully slice off the top with a serrated knife to make them even.
- Assemble the cake layers – Set one cake layer on your serving plate and spread a generous amount of frosting over the top before adding the second layer.
- Apply a crumb coat – Spread a thin layer of frosting over the whole cake and refrigerate for about 15 minutes to set the crumb coat.
- Frost generously – After the crumb coat has set, apply a thicker layer of frosting all over the cake. Smooth it out or create texture with a spatula, depending on your style.
Step 6: Decorate
Now comes the fun part—decorating! Here are some Swiftie-inspired ideas for your cake:
- Piping details – Use a piping bag with your favorite tip to create fun designs like swirls, flowers, or even write Taylor Swift lyrics on the cake!
- Sprinkles and edible glitter – For a sparkly touch, add some edible glitter or colorful sprinkles that match your Eras Tour theme.
- Add cake toppers – Use a heart-shaped topper for a Lover vibe, or add mini friendship bracelets for a fun Eras Tour touch.
- Write on the cake – If you’re feeling creative, use edible markers to write a quote from your favorite Taylor Swift song.
Once the cake is decorated, give yourself a moment to admire your work—this Taylor Swift birthday cake is the perfect tribute to the queen of pop! Enjoy slicing into it and sharing it with your fellow Swifties!
Pro Tips and Variations for Taylor Swift Birthday Cake
To really make your Taylor Swift birthday cake stand out and match your personal style or favorite Taylor Swift era, here are some tips and creative variations you can try. These ideas will help elevate your baking experience and take your cake to the next level!
Pro Tips for Perfecting Your Cake
- Room Temperature Ingredients: It’s always best to use room temperature ingredients, especially butter and eggs. They mix together more easily, giving you a smooth, fluffy cake batter. If you forgot to take them out in advance, a quick trick is to warm the eggs in a bowl of warm water for a few minutes and microwave the butter for 10 seconds to soften it.
- Don’t Overmix: When combining your wet and dry ingredients, remember less is more! Overmixing can lead to a dense, heavy cake. Stir until the ingredients are just blended together to maintain a light, fluffy texture.
- Baking Time: Oven temperatures can vary, so keep a close eye on your cake as it bakes. You can test if it’s done by inserting a toothpick into the center of the cake—if it comes out clean or with a few moist crumbs, it’s ready.
- Crumb Coat: A crumb coat is a thin layer of frosting you apply to the cake before your final layer of frosting. It helps seal in any loose crumbs and creates a smoother base for the final design. After applying the crumb coat, refrigerate the cake for 15-20 minutes to allow it to set.
- Chill the Frosting: If you want smooth, clean edges when frosting, consider chilling the buttercream before applying it to the cake. This will help it firm up and prevent it from melting into the cake as you frost it.
Creative Variations to Make Your Cake Unique
- Taylor Swift’s Eras: You can adapt your cake’s decorations to represent different Taylor Swift albums or eras. For example:
- Lover Era: Soft pastel-colored frosting with heart-shaped toppers and edible glitter will give your cake a dreamy, whimsical vibe.
- 1989 Era: Use bold colors like vibrant pinks and blues, maybe adding sparkles or geometric designs to reflect the bold pop style of the 1989 album.
- Reputation Era: Dark, moody tones like black and silver can give your cake a bold, dramatic look, with minimalistic designs like black roses or silver stars.
- Fearless Era: A cake with golden yellow frosting and shimmering gold accents can capture the essence of this era. You could even top it off with small, golden stars for an extra touch of sparkle.
- Flavor Variations: You can switch up the flavor of the cake to match your taste preferences. Try a chocolate cake base, a red velvet layer, or even a carrot cake for a more unique spin. For an extra twist, you can add fruit jams or nutella in between the layers for a burst of flavor.
- Frosting Variations: While traditional buttercream is delicious, there are so many other frosting options you can try. Consider:
- Cream Cheese Frosting for a tangy twist.
- Whipped Cream Frosting for a lighter, fluffier option.
- Chocolate Ganache for a rich, glossy finish.
- Add Fun Toppers: To make your cake extra personal, get creative with your decorations. Add edible Taylor Swift-themed items like a mini guitar or music notes made out of fondant, or sprinkle swiftie friendship bracelets around the base of the cake.
- Go Gluten-Free or Vegan: For those with dietary restrictions, you can adapt the recipe to make it gluten-free or vegan. For gluten-free, substitute the regular flour for a gluten-free all-purpose flour blend, and for vegan, swap out the eggs and butter for plant-based alternatives like flax eggs and vegan butter.
These tips and variations will help you add a personal touch and creativity to your Taylor Swift birthday cake, making it even more special and tailored to your celebration. Whether you’re celebrating your favorite album or just honoring the queen of pop, this cake will be the star of the party!
Serving Suggestions for Taylor Swift Birthday Cake
After all that hard work, it’s finally time to serve your Taylor Swift birthday cake and enjoy the fruits of your labor! Here are some fun and creative ways to present your cake and make it the highlight of your celebration:
1. Personalized Cake Slices for Each Era
For a truly unique twist, serve the cake with a little nod to Taylor’s Eras. You could cut the cake into slices and decorate each slice with frosting that represents a different album. For example, one slice could have pastel pink frosting for the Lover era, while another could have bold black and silver frosting for the Reputation era. It’s a fun way to get creative with presentation and give each guest a personalized taste of Taylor’s music!
2. Serve with a Side of Ice Cream
Nothing says celebration like cake and ice cream! Pair slices of your Taylor Swift birthday cake with vanilla, chocolate, or strawberry ice cream for a classic, crowd-pleasing combo. You could even match the ice cream flavor to the cake’s theme—think a creamy buttercream-flavored ice cream to complement your cake’s frosting!
3. Add Fresh Fruit or Berries
For a fresh touch, serve your cake with a side of fresh fruit like strawberries, raspberries, or blueberries. The tartness of the berries will balance the sweetness of the cake and add a refreshing contrast. If you’re doing a Fearless era theme with gold accents, you can even use sliced citrus fruits like lemon or orange to tie in the theme.
4. Creative Cake Plates
To really set the mood, think about how you present the cake itself. Use themed cake plates or platters that match the occasion. For a 1989-inspired look, opt for modern, sleek cake plates in metallic tones. If you’re channeling the Lover era, pastel-colored plates or heart-shaped dishes will perfectly complement the cake’s dreamy vibes.
5. Taylor Swift-Themed Garnishes
Add some edible glitter or sprinkles to the cake slices for a sparkly finish that catches the light, just like Taylor Swift’s stage presence. You could also decorate the plate with some flower petals, heart-shaped confetti, or mini song lyric quotes written on parchment paper. These little touches make the presentation feel special and give it a personal, Swiftie-approved flair.
6. Serve with a Toast to Taylor
If you’re celebrating with a group of Swifties, why not pair the cake with a Taylor Swift-themed drink? Whether it’s a signature cocktail like a Rosé Spritz (a nod to her Red album) or a fun, non-alcoholic option like a sparkling lemonade or pink punch, your guests will enjoy the extra touch of thematic fun!
7. Cake for a Crowd
If you’re hosting a large party, consider serving your Taylor Swift birthday cake alongside a cake buffet. Offer a few different flavors or cake styles—like a chocolate version, a red velvet version, or even a mini-cupcake version of your Taylor Swift cake. This way, everyone can have a little taste of everything, and it’s a great conversation starter!
8. Themed Cake Toppers
Enhance the cake’s presentation with themed cake toppers. You could use Taylor Swift’s album covers, her lyrics, or even fun music note shapes as cake toppers. For a more subtle touch, a simple birthday candle in the shape of Taylor’s iconic heart hand gesture can be a beautiful way to highlight the celebration.
9. Custom Cake Boxes for Takeaways
Let’s face it, sometimes the best part of a birthday cake is taking a slice home for later. If you’re throwing a party, consider providing your guests with themed cake boxes so they can take their slices home. You can personalize the boxes with a fun Taylor Swift lyric or a picture of the album that inspired the cake, making for an unforgettable party favor.
These serving suggestions will not only make your Taylor Swift birthday cake the star of the party but will also leave your guests feeling like they’re celebrating with Taylor herself. The key to a successful party is all in the details—so make sure to add a little Swiftie magic in every aspect of the celebration!
Conclusion for Taylor Swift Birthday Cake
And there you have it—your very own Taylor Swift birthday cake! The sweet dessert serves as a tribute to bring together the musical accomplishments and life experiences that Taylor has shared with the world throughout the years. Accepting birthday congratulations (or special events) will be unforgettable for anyone who likes Swiftian tunes whether as an established fan or a fresh discovery.
By following the simple steps and tips, you’ll create a cake that’s not only delicious but also personal, reflecting the themes and eras that make Taylor Swift’s music so special. From Lover’s pastel hues to Reputation’s boldness, each slice of this cake is a tribute to Taylor’s artistry and your love for her music. All the creative possibilities along with serving ideas enable you to personalize this cake exactly how you desire.
Acquire your necessary elements then begin preparing your cake while listening to Taylor Swift songs. Each serving of this birthday-cake experience will transform ordinary gatherings into extraordinary celebrations with or without celebrating an album release or birthday party events.
Remember, the key to a perfect Taylor Swift birthday cake is not just in the recipe but in the joy and love you pour into it. You should make the most of the baking process by expressing your creativity while having the most important priority to have fun. Such behavior reflects exactly what Taylor Swift would accomplish.
Ready to take your cake decorating skills to the next level? Explore expert tips and hands-on resources from the University of Wisconsin-Madison Extension and start transforming your cakes into edible masterpieces today!
Taylor Swift Birthday Cake
Ingredients
For the Cake:
- You can use vanilla chocolate, or funfetti as your base—whatever fits your vibe!
- 2 ½ cups 315g all-purpose flour – The base for a soft, tender cake.
- 2 ½ tsp baking powder – Helps the cake rise and stay light.
- ½ tsp salt – Balances sweetness and enhances flavor.
- 1 cup 225g unsalted butter, softened – Gives richness and moisture.
- 2 cups 400g granulated sugar – Adds the perfect sweetness.
- 4 large eggs – Make the cake fluffy and hold everything together.
- 1 tbsp vanilla extract – Because everything is better with vanilla.
- 1 cup 240ml whole milk – Adds moisture and keeps the cake soft.
- For a chocolate version, swap ½ cup of flour for ½ cup (40g unsweetened cocoa powder.)
For the Buttercream Frosting:
- This buttercream is smooth pipeable, and perfect for decorating—whether you’re going for a pastel Lover theme or a bold Reputation look.
- 1 ½ cups 340g unsalted butter, softened – The key to creamy, dreamy frosting.
- 5 cups 600g powdered sugar – Sweet and smooth for easy piping.
- ¼ cup 60ml heavy cream or milk – Adjusts the consistency.
- 1 tbsp vanilla extract – Adds that classic bakery flavor.
- A pinch of salt – Balances the sweetness.
- Gel food coloring – For Swiftie-inspired hues pastel pink, bold red, deep blue—whatever matches your vibe!.
Fun Extras for Decorating:
- This is where you can really bring your Taylor Swift cake ideas to life!
- Sprinkles – Because no Swiftie cake is complete without a little sparkle.
- Edible glitter – Perfect for a Fearless-era gold shimmer or Midnights-inspired shine.
- Piping bags & tips – For swirls lettering, and fun accents.
- Heart-shaped cake topper – A nod to Lover or Red.
- Mini friendship bracelets made from candy or icing – For a fun Eras Tour touch.
- Edible markers – Write lyrics or song titles directly on the cake!
Instructions
Step 1: Preheat & Prepare
- Start by getting your oven ready for baking:
- Preheat your oven to 350°F (175°C).
- Grease and line two 8-inch round cake pans with parchment paper to ensure the cakes come out easily.
Step 2: Mix the Cake Batter
- Whisk the dry ingredients – In a medium bowl, whisk together the flour, baking powder, and salt. Set this aside for now.
- Cream the butter and sugar – In a large bowl, beat the softened butter and sugar using an electric mixer until the mixture is light and fluffy (this usually takes about 2-3 minutes).
- Add the eggs – Add the eggs one at a time, mixing well after each addition to keep the batter smooth. Once all the eggs are in, add the vanilla extract and beat until combined.
- Combine the dry and wet ingredients – Gradually add half of the dry ingredients into the batter, followed by half of the milk. Mix well before adding the remaining dry ingredients and milk. Stir gently until everything is just combined, making sure not to overwork the batter.
Step 3: Bake the Cake
- Pour the batter evenly into the two prepared cake pans.
- Bake in the preheated oven for 28-32 minutes, or until a toothpick inserted into the center comes out clean.
- Allow the cakes to cool in the pans for around 10 minutes, then carefully remove them and transfer to a wire rack to cool fully.
Step 4: Prepare the Buttercream Frosting
- Beat the softened butter in a large bowl until it’s smooth and creamy.
- Gradually add the powdered sugar, mixing at low speed to avoid a sugary cloud, then increase to medium speed until fully combined.
- Add vanilla extract and heavy cream, then beat on high for about 2-3 minutes until the frosting is light and fluffy. If you need to adjust the consistency, add a little more cream or powdered sugar as needed.
- Divide the frosting into separate bowls if you want to use different colors, then add gel food coloring to each bowl to match your chosen Taylor Swift era.
Step 5: Assemble the Cake
- Level your cakes – If the cakes have domed on top, carefully slice off the top with a serrated knife to make them even.
- Assemble the cake layers – Set one cake layer on your serving plate and spread a generous amount of frosting over the top before adding the second layer.
- Apply a crumb coat – Spread a thin layer of frosting over the whole cake and refrigerate for about 15 minutes to set the crumb coat.
- Frost generously – After the crumb coat has set, apply a thicker layer of frosting all over the cake. Smooth it out or create texture with a spatula, depending on your style.
Step 6: Decorate
- Now comes the fun part—decorating! Here are some Swiftie-inspired ideas for your cake:
- Piping details – Use a piping bag with your favorite tip to create fun designs like swirls, flowers, or even write Taylor Swift lyrics on the cake!
- Sprinkles and edible glitter – For a sparkly touch, add some edible glitter or colorful sprinkles that match your Eras Tour theme.
- Add cake toppers – Use a heart-shaped topper for a Lover vibe, or add mini friendship bracelets for a fun Eras Tour touch.
- Write on the cake – If you’re feeling creative, use edible markers to write a quote from your favorite Taylor Swift song.
Video
Notes
- Prep Time: 30 minutes
- Cook Time: 25-30 minutes
- Total Time: 1 hour (includes cooling time)
- Servings: 12-14 slices
- Calories: Approx. 450 calories per serving (based on standard portion size)
FAQs about Taylor Swift Birthday Cake
Baking a Taylor Swift birthday cake is bound to spark some fun questions, right? Whether you’re a seasoned baker or a first-timer, it’s totally normal to have a few doubts along the way. So let’s clear up some of the most common questions that pop up when making this sweet treat. If you have more, don’t hesitate to ask—I’m all ears and happy to help!
1. Can I use a different frosting instead of buttercream?
Oh, for sure! The buttercream is a classic choice and works beautifully, but feel free to mix things up. If you want something a little tangier, cream cheese frosting could be a perfect match, especially if you’re working with a red velvet or citrusy cake. If you’re going for lighter vibes, whipped cream frosting is great too. And if you’re craving rich and indulgent, you can’t go wrong with chocolate ganache. Your cake, your rules!
2. Can I make the cake ahead of time?
Absolutely! This cake keeps really well. You can bake the layers a day or two in advance, just wrap them up tightly in plastic wrap once they’ve cooled. Keep them at room temperature if you’re using them soon or pop them in the freezer if you need more time. When you’re ready to frost, just let them come to room temperature and you’re good to go. Easy peasy!
3. What if I don’t have whole milk?
No worries if whole milk isn’t in your fridge! You can swap it out for 2% milk, almond milk, or even buttermilk if you want a bit of extra tang in the flavor. Just be sure to pick something unsweetened (unless you like your cake on the sweeter side—no judgment here!). It’ll still turn out yummy.
4. Can I make cupcakes instead of a whole cake?
Of course! If you’re in the mood for cupcakes, just divide the batter evenly into a lined cupcake pan. Bake them at the same temperature for around 18-20 minutes, or until a toothpick comes out clean. Frost them just like you would the cake, and boom—you’ve got Taylor Swift-inspired cupcakes ready to wow your friends!
5. How do I get the frosting to look smooth?
Getting that perfect, smooth frosting is easier than you think! After you frost the cake, take an offset spatula or bench scraper and gently smooth it out. If you want a flawless finish, try chilling the cake for a bit before smoothing. A quick 15-20 minutes in the fridge will help firm it up, making the frosting easier to work with. But hey, don’t stress too much if it’s not perfect! The love you put into it will shine through no matter what.
6. Can I decorate it for a themed party?
Yes! In fact, I highly encourage it! A Taylor Swift-themed birthday party is the perfect excuse to get creative with your cake. Whether you’re inspired by Lover’s soft pastels or the Reputation-era glitz, you can easily match the frosting and decorations to Taylor’s eras. Think album-inspired colors, sprinkles to match her album covers, or even a custom topper with song lyrics or album art. The possibilities are endless!
7. What if my cake layers turn out uneven?
Hey, it happens! If your layers aren’t perfectly level, don’t panic. You can easily trim them with a serrated knife to even things out. If you’re all about the smooth look, apply a crumb coat (a thin layer of frosting) to seal in the crumbs, pop the cake in the fridge for 20 minutes to set it, then go for the final frosting layer. It’ll smooth out beautifully. And if all else fails, you can always pipe some decorative designs to hide any imperfections.
8. Can I make this gluten-free?
Totally! You can make this cake gluten-free by using a good gluten-free flour blend. Just make sure it’s one designed for baking so you get the best texture. Also, be sure to check that your baking powder is gluten-free (most are, but it’s good to double-check!). It might require a little trial and error, but you’ll still end up with a delicious cake!
Eager to explore more delightful cake designs? Check out our step-by-step guide on crafting a charming Hello Kitty Birthday Cake, complete with fondant decorations and buttercream accents. It’s a fun project that will impress both kids and adults alike!